2019/03/28 - [SW개발] - Kotlin + Spring boot security + thymeleaf 로그인 구현(1)
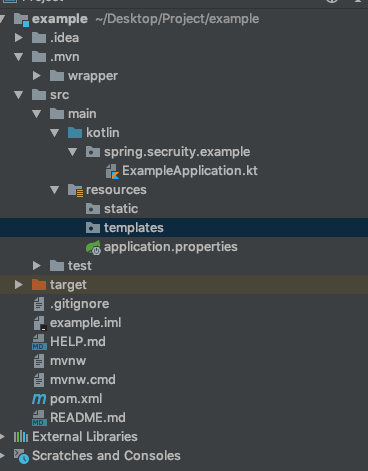
프로젝트가 무사히 생성 됐다면, 위 화면처럼 됐을겁니다.
간단한 로그인 구현은 이렇게 만들어진 프로젝트에서 해보겠습니다.
1. UserDeatails 인터페이스 구현
Security에서 사용할 UserDetails객체를 구현합니다. 이는 사용자의 정보를 담아주는 역할을 합니다.
class MyUserDetail(val id : String, val pw : String, val role : String) : UserDetails {
    override fun getAuthorities(): MutableCollection<out GrantedAuthority> {
        val authorities = ArrayList<GrantedAuthority>()
        authorities.add(SimpleGrantedAuthority(role))
        return authorities
    }

    override fun getPassword() = pw

    override fun getUsername() = id

    override fun isCredentialsNonExpired() = true

    override fun isEnabled() = true

    override fun isAccountNonExpired() = true

    override fun isAccountNonLocked() = true
}- 1 행 : 객체가 가지게 되는, 데이터입니다 - 예시에서는 id, pw, role(역할)
- 2행 : 객체가 가지게 되는, 권한(authorites)을 반환합니다 - 예시에서는, role의 값을 역할로 반환해줍니다
- 8행. 9행 : 각각 패스워드와 아이디를 반환합니다
- 나머지 : 이 객체가 유효한지에 대한 정보를 반환합니다
2. AuthenticationProvider 인터페이스 구현
Security에서, 내가 받을 UserDetails의 정보를 바탕으로, authenticate를 직접 수행해 줄, provider입니다. 이 인터페이스를 구현함으로서 Security는 Authentication을 할 수 있습니다.
@Service
class MyAuthenticationProvider : AuthenticationProvider {
    companion object {
        val idAndPw = mapOf("admin" to "123", "user" to "456")
        val idAndRole = mapOf("admin" to "ROLE_ADMIN", "user" to "ROLE_USER")
    }


    override fun authenticate(authentication: Authentication): Authentication {
        val authToken = authentication as UsernamePasswordAuthenticationToken

        return when (idAndPw[authToken.principal.toString()] == authToken.credentials.toString()) {
            false -> {

                throw BadCredentialsException("Id & Password are Not Matched")
            }
            true -> {
                val userDetail = MyUserDetail(authToken.principal.toString(), authToken.credentials.toString(), idAndRole[authToken.principal.toString()]!!)
                UsernamePasswordAuthenticationToken(userDetail, userDetail.pw, userDetail.authorities)
            }
        }
    }

    override fun supports(authentication: Class<*>?): Boolean = true
}- 1행 : Provider를 @Service 어노테이션을 통해, 빈 등록을 해줍니다
- 3~6행 : 실제로는 데이터베이스 등에 있는 값으로, 로그인을 해야합니다. 하지만 편의상 예시로 만든 프로젝트이기 때문에 직접 코드로에 값을 넣어주었습니다. admin(id) / 123(pw) / ROLE_ADMIN (role)
- 9행 : 실제로 authenticate를 해주는 method를 오버라이드 하였습니다 - authentication객체는, 후에 html를 통해, 받아오는 id, pw가 담긴 객체입니다.
- 10행 : authentication의 객체로, Username과 Password가 담긴 UsernamepasswordAuthenticationToken을 만들어줍니다
- 13~22행 : id와 pw가 일치하면, role과함께 userdeail이 담긴 token을 반환해줍니다. 일치하지않으면 BadCredentialsException을 발생시킵니다.
- 24행 : 넘어온 authentication 객체가 유효한지 반환하는 method입니다.
여기까지, Authentication을 하기 위한, Userdetail과 Provider에 관한 구현입니다.
'SW개발' 카테고리의 다른 글
| 젠킨스 파이프라인 ( Jenkins pipeline ) - 병렬로 Job 실행하기 (1) | 2019.05.08 |
|---|---|
| Kotlin + Spring boot security + thymeleaf 로그인 구현(3) (0) | 2019.04.04 |
| Kotlin + Spring boot security + thymeleaf 로그인 구현(1) (0) | 2019.03.28 |
| Spring Boot Security (2) | 2019.03.28 |
| 2018년 하반기 취업준비 후기(Kakao 최종 합격) (30) | 2018.11.17 |


